

How to Start Needlepoint as a Beginner: 2026 Guide
Table of Contents
- What You'll Need Before Your First Stitch
- How to Choose Needlepoint Kits for Beginners
- How to Start Needlepoint: Step-by-Step for Your First Project
- Best Needlepoint Stitches for Beginners to Master First
- How to Troubleshoot Tension, Puckering, and Common Frustrations
- Ergonomics and Posture: Stitching Without the Aches
- Fiber Types and Selection: Wool, Silk, and Cotton Explained
- Budget-Friendly vs. Premium Needlepoint Setups
- Where to Go From Here
- Frequently Asked Questions
Last Updated: September 13, 2026
What You'll Need Before Your First Stitch
Learning how to start needlepoint as a beginner comes down to three things: a tapestry needle, the right thread, and a canvas you can actually see.
Needlepoint is a counted-thread embroidery technique in which stitches cover a rigid, open-weave canvas to create a dense, durable fabric surface. Unlike cross stitch, needlepoint covers the entire canvas rather than leaving the grid exposed.
The Non-Negotiables: Needle, Thread, and Canvas
You need three items to make a single stitch:
- Tapestry needle: A blunt-tipped needle with an eye large enough for wool. Size 18-22 covers most beginner canvases.
- Thread or yarn: Tapestry wool is the standard for painted canvases. Embroidery floss works on finer mesh.
- Canvas: Interlock or mono canvas, not the stiff aida used for cross stitch.
Nice-to-Haves That Make Learning Easier
Not required, but they prevent the frustration that makes people quit:
- Embroidery hoop or stretcher bars to keep tension even
- Needle minder so you stop losing needles in the couch
- Small scissors for clean thread ends
- Good lighting, a task lamp beats squinting every time
How to Choose Needlepoint Kits for Beginners
The best needlepoint kits for beginners share three traits: a printed or hand-painted canvas with clearly blocked color areas, a mesh count between 12 and 14, and enough thread to finish with margin to spare. Skip anything labeled "advanced" or "counted only" for your first project.
What to Look for in a Starter Kit
Check these before you buy:
- Mesh size: 12-14 mesh is easier to see and count than 18 mesh. Mesh count is the number of canvas threads per inch: a 12-mesh canvas has larger holes, thicker thread, and faster coverage, while an 18-mesh canvas offers finer detail but slower progress and real eye strain for a first project.
- Design scale: A 4x4 inch design finishes faster than a 10x10 inch one. On 13-mesh canvas, a 4x4 inch design is about 2,700 stitches, roughly 27 hours at 100 stitches an hour, while a 10x10 inch design is about 16,900 stitches, or over 160 hours (needlepoint.org). Start small.
- Thread included: Wool is more forgiving than silk for a first project. Silk shows every tension inconsistency, and beginners have tension inconsistencies.
- Chart or painted guide: A painted canvas shows exactly where each color goes. A counted chart requires counting mesh intersections from a graph, an extra difficulty you do not need in week one.
How to Tell If a Kit Has Enough Thread
This is the question most kit listings do not answer, and it matters most: a kit that runs out of a color mid-design leaves you hunting for a dye-lot match, which is often impossible.
Experienced stitchers estimate thread needs by stitch count. On 13-mesh canvas, one strand of standard tapestry wool covers roughly 30 to 40 tent stitches per yard, so a 4x4 inch design at 2,700 stitches needs roughly 70 to 90 yards total across its colors (needlepoint.org). If a kit lists thread quantity, do the math; if it does not, that is a warning sign.
If you are shopping locally, ask to open the kit and check the canvas weave. A canvas that feels flimsy or has gaps in the mesh will pucker once stitched. Interlock canvas has two threads twisted together at each intersection and will not ravel when cut; mono canvas has single threads and needs binding or taping at the edges before you start, or it will unravel as you work.
Budget-Friendly vs. Premium Needlepoint Setups
You can start needlepoint for very little or spend considerably more, and the difference is not always about quality. A budget setup, a single beginner kit, one tapestry needle, and a basic hoop, is genuinely enough to finish a first project. A premium setup adds stretcher bars, a floor or lap stand, needle minders, and a curated thread collection. These make long sessions more comfortable and larger projects easier to manage, but none will make your first stitches look better. Buy them after you know you will stick with it.
Pricing on canvases, threads, and accessories varies by design and materials, so check current pricing on our site or stop in and ask.
How to Start Needlepoint: Step-by-Step for Your First Project
The mechanics of how to start needlepoint take about ten minutes to learn. The first stitch is a tent stitch worked over a single canvas intersection, and every beginner technique builds from there.
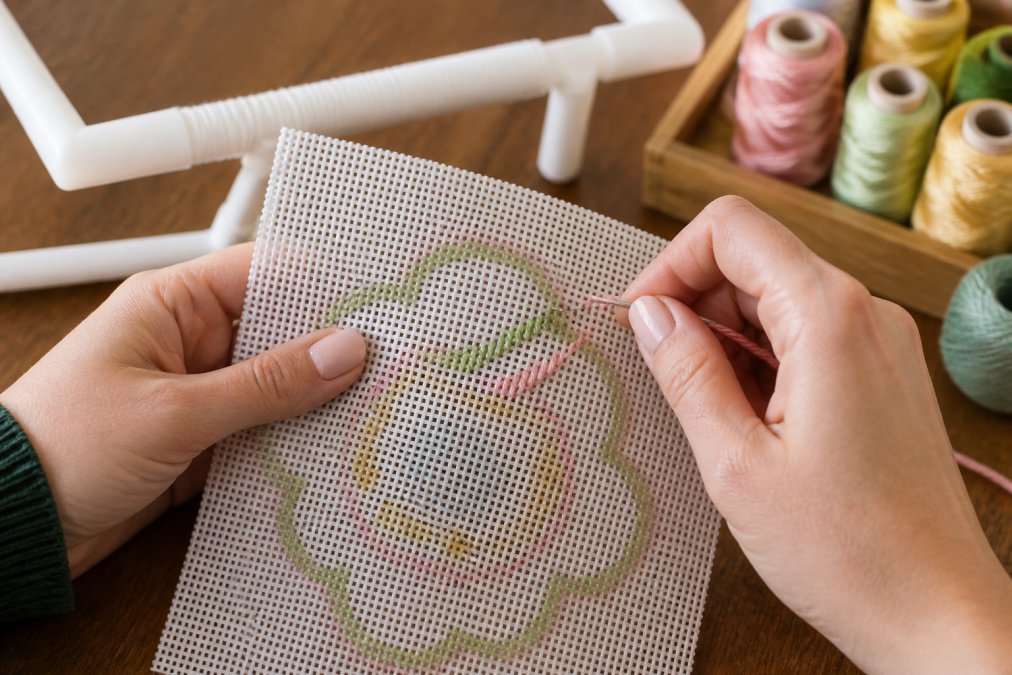
Step 1: Set Up Your Canvas and Thread
Mount your canvas on stretcher bars or slide it into an embroidery hoop so the surface stays taut, tap it with a fingertip and you should hear a light drum sound, not a dull thud. If it sags, tighten the hoop screw or push the stretcher bars apart another quarter inch.
Cut a length of thread about 18 inches long. Longer strands tangle and fray, and the friction of dragging them through the canvas thins the fiber, showing up later as patchy coverage. Thread your tapestry needle by folding the yarn end over the needle, pinching the fold flat, and pushing the folded tip through the eye, faster and cleaner than wetting the end, which weakens wool.
Tie a small waste knot, a simple overhand knot, at the end of the thread, but leave it on the front of the canvas about an inch from where you plan to stitch, not at your starting hole. You will stitch over that inch of thread later and clip the knot away, anchoring the tail without a knot ever living in your finished work.
Step 2: Learn the Tent Stitch and Basketweave Stitch
The tent stitch is the foundation of needlepoint. Bring the needle up through one canvas hole from the back, then down through the diagonal hole above and to the right, covering one canvas intersection. Pull the thread through until it lies flat against the canvas, but do not cinch it, the stitch should sit on the surface, not sink into the mesh.
The continental stitch works left to right in rows: come up in the next hole to the right of your last stitch and go down one hole up and to the right, repeating across the row. It is the easiest motion to learn, but it pulls the canvas slightly out of shape because every stitch leans the same direction.
The basketweave stitch alternates diagonal direction to keep the canvas square: work a diagonal block up and to the right, then turn and work the next block down and to the left, like weaving a basket. The motion feels awkward for ten minutes, then becomes automatic. On any area larger than a few inches, basketweave keeps your finished piece from turning into a parallelogram.
Step 3: End Your Thread Cleanly
When you have about two inches of thread left, stop. Run the needle under the backs of four or five already-worked stitches on the reverse side, then clip the tail flush. Do not knot the end, knots create bumps that show through on the front and work loose over time, while the woven-under tail holds better and lies flat.
Once you have completed a row, flip the canvas over. The reverse should look like neat diagonal rows, not a tangle of loops and carried threads. Long horizontal jumps mean you carried the yarn too far between color areas, clip it and restart that section with a fresh length.
Best Needlepoint Stitches for Beginners to Master First
Start with three stitches and ignore the rest until they feel automatic. The best needlepoint stitches for beginners are tent, basketweave, and a simple backstitch for outlines. Master these and you can complete most beginner canvases without touching a chart.
| Stitch | Difficulty | Best Used For | Direction |
|---|---|---|---|
| Tent | Beginner | Small areas, details | Diagonal, single |
| Basketweave | Beginner | Large background areas | Alternating diagonal |
| Continental | Beginner | Borders, small shapes | Left to right rows |
| Backstitch | Beginner | Outlines, lettering | Along canvas lines |
Once these feel natural, tent stitch variations like half-cross and petit point open up. Don't rush it, stitchers who skip straight to decorative stitches usually end up ripping out work.
How to Troubleshoot Tension, Puckering, and Common Frustrations
Tension problems cause nearly every beginner frustration, and they almost always trace back to thread length or canvas mounting. If stitches look loose or the canvas puckers, check these first:
- Thread too long: Cut strands to 18 inches. Long thread thins as it drags through the canvas.
- Canvas not taut: Remount on stretcher bars or tighten the hoop.
- Too many strands: Most 13-mesh canvas takes one strand of tapestry wool, not two.
- Pulling too hard: Let the thread lie flat against the canvas rather than cinching it.
Puckering usually means your canvas weave is too loose for the thread weight. If the problem persists, drop to a finer thread or a tighter mesh count on your next project.
Ergonomics and Posture: Stitching Without the Aches
Neck and shoulder strain ends more needlepoint hobbies than boredom does. Set up so your canvas sits at roughly chest height, elbows close to your body, and the work angled slightly toward you rather than flat on a table. A lap stand or floor frame does more for posture than any cushion.
Take a break every 20-30 minutes: roll your shoulders, stretch your hands, and look across the room to reset your focus (osha.gov). Stitchers who ignore this end up with the repetitive-strain complaints that plague any fine handwork.
Fiber Types and Selection: Wool, Silk, and Cotton Explained
Tapestry wool is the default for painted canvases because it covers the mesh fully and holds up to wear. Silk has more sheen and suits decorative pieces, but it's less forgiving and shows every tension mistake. Cotton embroidery floss is cheapest and easiest to find, though it covers less densely and can look thin on 12-mesh canvas.
Match fiber to purpose: wool for pillows and belts, silk for framed art, cotton for practice pieces. A small sampler of each lets you feel the difference before committing to a full project.
Budget-Friendly vs. Premium Needlepoint Setups
You can start needlepoint for very little or spend considerably more, and the difference isn't always about quality. A budget setup means a single beginner kit, one tapestry needle, and a basic hoop. That's genuinely enough to finish a first project.
A premium setup adds stretcher bars, a floor or lap stand, needle minders, and a curated thread collection. These make long sessions more comfortable and larger projects easier to manage, but none of them will make your first stitches look better. Buy them after you know you'll stick with it.
Pricing on canvases, threads, and accessories varies by design and materials, so check current pricing on our site or stop in and ask.
Where to Go From Here
The hardest part of needlepoint is starting, and the second-hardest is finishing your first piece without abandoning it in a drawer. The Rabbit Hole Stitchery offers a curated selection of canvases, threads, and needle minders, plus beginner-friendly classes and social stitching events where you can ask questions in person. We also carry collegiate and sorority designs if you want your first project to mean something personal.
Get started with The Rabbit Hole Stitchery and turn a single tent stitch into a hobby that actually sticks.
Frequently Asked Questions
Is needlepoint easy for beginners?
Yes, needlepoint is very accessible for beginners. The tent stitch, which is the foundation of most needlepoint projects, uses a simple diagonal motion that most people pick up in minutes. Unlike knitting or crochet, you work with a single needle and thread on a stable canvas, so there's no complex hand coordination to master. Many stitchers complete their first small project in a single evening. The key is starting with a simple design and not worrying about perfection on your first attempt.
What does a beginner need for needlepoint?
At minimum, you need three things: a needlepoint canvas (preferably a painted or printed design), tapestry wool or thread, and a tapestry needle with a blunt tip. Beyond those basics, a pair of small scissors, a needle threader, and a frame or stretcher bars will make your stitching more comfortable. Many beginners also find a needlepoint kit helpful because it bundles everything together. As you progress, you may want to add a laying tool, a needle minder, and a project bag to keep everything organized.
What is the easiest needlepoint stitch for a beginner?
The tent stitch is the easiest and most common needlepoint stitch for beginners. It's worked diagonally over one intersection of the canvas mesh, creating a smooth, durable surface. The basketweave stitch is a variation of the tent stitch that's worked in a diagonal pattern to prevent canvas distortion. Start with the tent stitch on a small project to build confidence, then try basketweave once you're comfortable with the basic motion. Both stitches use the same technique, just in different sequences.
What is the difference between needlepoint and cross stitch?
Needlepoint uses a single diagonal stitch (the tent stitch) to cover the entire canvas, creating a dense, durable fabric. Cross stitch uses X-shaped stitches on an even-weave fabric, leaving the background fabric visible. Needlepoint canvas has a stiff, open grid that holds its shape, while cross stitch fabric is softer and more pliable. Needlepoint projects tend to be smaller and more textured, often used for pillows, ornaments, and belts. Cross stitch is typically flatter and used for framed pictures and samplers.
Starting needlepoint as a beginner doesn't require talent, expensive equipment, or a perfect first stitch. It requires a canvas you can see, a needle that fits your thread, and the willingness to rip out a row and try again. The Rabbit Hole Stitchery stocks beginner kits, hosts classes for new stitchers, and keeps a curated selection of canvases and threads on hand so you can feel the difference before you buy. Shop online or visit us to pick your first project in person.