

Easy Needlepoint Stitches for Beginners
Table of Contents
- What Makes a Needlepoint Stitch Easy for Beginners
- Essential Needlepoint Tools You Need to Get Started
- Continental Stitch: The Foundation
- Half Cross Stitch: Speed and Simplicity
- Basketweave Stitch: Durability Without Distortion
- Best Needlepoint Stitches for Backgrounds
- How to Start Needlepoint as a Beginner
- Frequently Asked Questions
Last Updated: September 27, 2026
What Makes a Needlepoint Stitch Easy for Beginners
The foundation of needlepoint success rests on choosing the right easy needlepoint stitches to start with. A beginner's first stitch should accomplish three things: it should be simple enough to execute without frustration, it should cover canvas efficiently, and it should produce results that look intentional rather than accidental.
At The Rabbit Hole Stitchery, we've watched countless new stitchers gain confidence by starting with techniques that reward consistency rather than demanding perfection. The difference between a beginner who sticks with needlepoint and one who abandons it often comes down to that first week of stitching. When your initial attempts produce recognizable results, you keep going. When they don't, the project ends up in a drawer.
Easy needlepoint stitches for beginners share one critical trait: they follow predictable directional patterns. Your hand repeats the same motion over and over. There's no complicated angle-switching or counting required. The continental stitch, half cross, and basketweave all work this way. They're the gateway stitches that build muscle memory and confidence before you attempt anything more complex.
Essential Needlepoint Tools You Need to Get Started
Starting needlepoint requires surprisingly few tools, but each one serves a specific purpose. You cannot substitute or skip them without compromising your results.
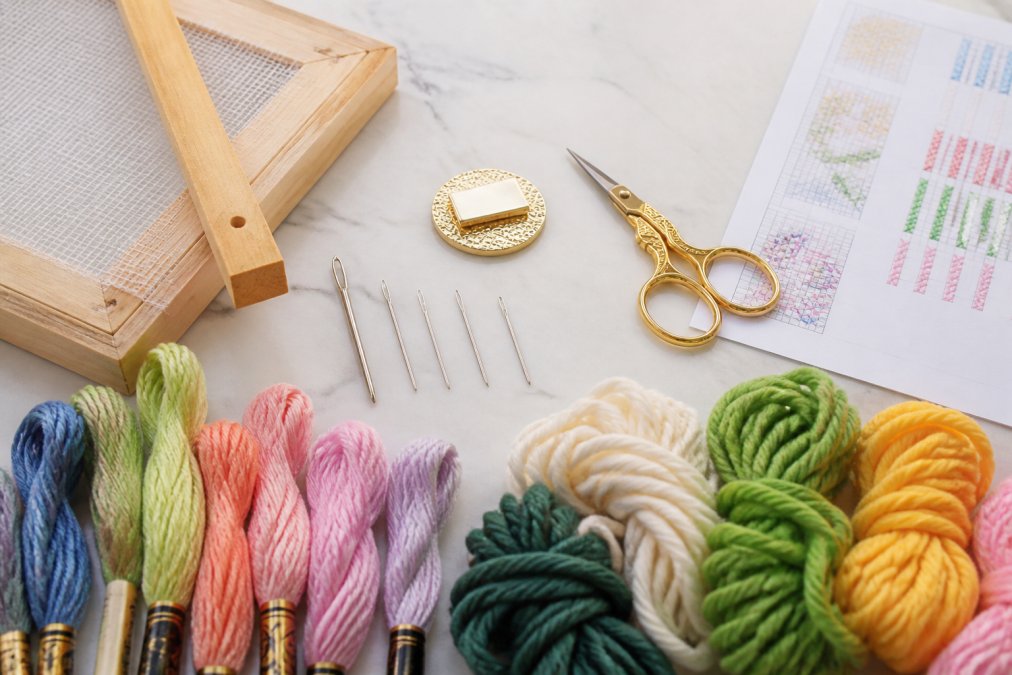
A tapestry needle is your primary tool. Unlike sewing needles, tapestry needles have a blunt tip and a larger eye designed to accommodate thicker threads. The size matters, beginners typically start with a size 18 or 20 needle, which fits most standard canvas mesh sizes. A needle that's too small will frustrate you; too large and it damages the canvas.
Stretcher bars hold your canvas taut during stitching. Canvas that moves or sags produces uneven stitches and wastes energy. Quality stretcher bars prevent hours of rework. Many beginners try to stitch without them and regret it within minutes.
Embroidery floss and tapestry wool are your thread options. Embroidery floss is thinner and works well for detailed areas or smaller canvas mesh. Tapestry wool is thicker and covers canvas faster, ideal for backgrounds. A needle minder keeps your needle from rolling off your project. It sounds minor until you're searching your lap for the third time.
Canvas comes in different mesh counts. A 14-count canvas (14 holes per inch) is standard for beginners. Smaller mesh (18-count or higher) requires more stitches and finer thread. Larger mesh (10-count) works faster but leaves more room for error visibility. Start with 14-count unless you have specific reasons otherwise.
The Rabbit Hole Stitchery stocks all these essentials in beginner-friendly bundles, so you're not hunting across multiple retailers to assemble a starter kit.
Continental Stitch: The Foundation
The continental stitch is the most common needlepoint stitch for good reason: it's reliable, produces dense coverage, and creates a professional appearance.
The continental stitch creates a diagonal line of thread on the front of your canvas and a longer diagonal line on the back. You work in horizontal rows, moving from left to right, then right to left on the next row. The thread anchors itself through the back coverage, producing a stitch that doesn't shift or loosen over time.
Here's the basic motion: bring your needle up through the canvas, move one hole diagonally up and to the right, and push down. Then come back up one hole to the left of where you started. That's one stitch. Repeat this motion across the entire row, then flip your direction on the next row. The rhythm becomes automatic after a few minutes.
The continental stitch uses more thread than some alternatives. That matters for large projects. However, the durability trade-off justifies the extra thread consumption. Continental stitches hold up to handling and wear better than faster techniques.
Tension consistency matters here. If some stitches are tight and others loose, the finished piece looks uneven. Aim for moderate tension, snug enough that the stitch doesn't move, loose enough that you're not straining the canvas or thread.
Half Cross Stitch: Speed and Simplicity
The half cross stitch is the fastest easy needlepoint stitch for beginners who want to see progress quickly. It covers canvas with roughly 40 percent less thread than the continental stitch, so larger projects become feasible on a budget.
The half cross stitch creates only the diagonal line on the front of your canvas. The back shows minimal thread coverage. This makes it ideal for backgrounds where coverage matters more than durability. It's also the stitch of choice for projects that will hang on a wall rather than receive heavy handling.
The motion is nearly identical to the continental stitch, one diagonal movement per stitch. The difference is that you skip the return journey on the back. Your needle emerges one hole away, ready for the next stitch. This simplification saves time without sacrificing the front appearance.
One caution: because the back coverage is minimal, the canvas itself shows through if you pull stitches too tight. Beginners often over-tighten, thinking tighter equals better. With the half cross stitch, moderate tension is even more critical. Your stitches should sit flat against the canvas without compressing it.
The half cross stitch works beautifully on larger canvas mesh (12-count or lower) where the bigger holes accommodate thicker thread. On smaller mesh, the back coverage becomes too sparse and the stitch loses its structural integrity.
Basketweave Stitch: Durability Without Distortion
The basketweave stitch solves a problem that plagues many needlepoint projects: canvas distortion. When you work continental or half cross stitches, all your diagonal threads lean the same direction. This creates tension that pulls the canvas out of shape. Basketweave stitches lean alternately left and right, distributing tension evenly.
The basketweave stitch creates a woven appearance on the back of your canvas, hence the name. You work in diagonal rows instead of horizontal ones. The first row leans one direction; the next row leans the opposite direction. The pattern repeats.
Learning basketweave takes slightly longer than continental or half cross. The directional change requires attention. However, once you develop the rhythm, many stitchers prefer it because the canvas stays square and true throughout the project. Your finished piece won't require blocking or stretching to return to its intended shape.
Basketweave is particularly valuable for large projects where canvas distortion compounds. A small 6-by-8-inch piece might not show distortion noticeably. A 12-by-16-inch piece absolutely will if you use only one-directional stitches. Basketweave prevents this problem entirely.
The stitch uses approximately the same amount of thread as the continental stitch, so thread consumption isn't a deciding factor. The main trade-off is learning curve. Spend an extra session or two mastering basketweave, and you'll thank yourself when your finished project emerges perfectly square.
Best Needlepoint Stitches for Backgrounds
Backgrounds consume the majority of stitching time on most projects. Choosing the right background stitch dramatically affects both your pace and your final result.
The continental stitch works for backgrounds but isn't the fastest choice. The half cross stitch excels at background coverage when speed matters and the piece won't receive heavy handling.
How to Start Needlepoint as a Beginner
Beginning needlepoint requires preparation but not complexity. A methodical approach prevents frustration and builds confidence from your first stitches.
Thread Management and Tension
Thread management determines whether your finished piece looks polished or amateur. Beginners often underestimate this element.
Common Beginner Mistakes to Avoid
Neglecting to secure your thread properly at the start and end causes stitches to unravel. Use a waste knot at the beginning, tie a knot on the front of the canvas, bring your needle up from behind, and stitch over the knot until it's secured. Trim the knot away. At the end, weave your thread under existing stitches on the back to anchor it. These techniques take seconds and prevent hours of unraveling.
Frequently Asked Questions
What are the easiest needlepoint stitches for complete beginners?
The continental stitch, half cross stitch, and basketweave stitch are the three easiest stitches for beginners. The continental stitch creates a strong diagonal line and covers canvas quickly. The half cross stitch is faster and uses less thread but requires practice to maintain even tension. The basketweave stitch prevents canvas distortion and works well for background coverage. Start with continental or half cross, then move to basketweave once you're comfortable with basic stitch direction and tension control.
What supplies do I need to start practicing needlepoint stitches?
You'll need needlepoint canvas (14-18 count is ideal for beginners), a tapestry needle (size 18-22), embroidery floss or tapestry wool, stretcher bars to hold your canvas taut, and small scissors. A needle minder keeps your needle secure between stitching sessions. A stitch diagram or guide helps you follow the correct stitch direction. Many beginners find it helpful to start with a small practice canvas or kit before investing in a full project. Check your local needlepoint shop for beginner-friendly starter kits.
How do I choose the right needlepoint stitch for a pattern?
Consider three factors: coverage (how much canvas area the stitch fills), durability (how well it holds up over time), and thread consumption (how much yarn you'll use). Continental and basketweave stitches provide excellent coverage and durability for background areas. The half cross stitch works best for decorative elements where durability matters less. Stitch diagrams in your pattern typically recommend which stitches to use for different sections. Start with the stitch your pattern suggests, then experiment with variations as you gain confidence.
Can I learn needlepoint stitches if I've never done needlework before?
Yes, absolutely. Needlepoint is more forgiving than knitting or crochet because stitches are locked into canvas and mistakes are easier to fix. The basic stitches follow simple, repetitive movements that become automatic with practice. Many beginners find needlepoint less frustrating than other fiber arts because progress is visible quickly and the learning curve is gentle. Start with a small project, focus on one stitch at a time, and don't worry about perfection in your first attempts. Most people master basic stitches within a few hours of practice.